I joined my third Tiny Piecing Sew Along with Giucy Guide and Alison Glass. They came out with a pattern for the alphabet.
Bits Of Whimsy Quilts
Sewing love into my world one stitch at a time❣️
Saturday, October 26, 2024
Tiny Piecing Mini Series Quilt
Wednesday, July 3, 2024
The Liberty Flag Quilt πΊπΈ
Tuesday, August 15, 2023
The Bzzzzzz Quilt π
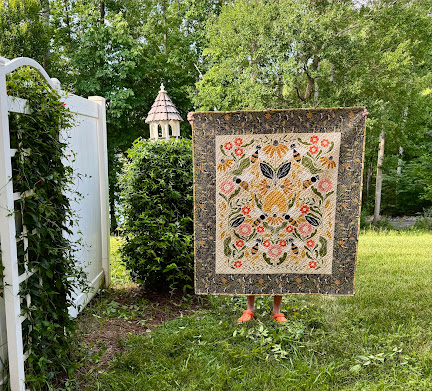
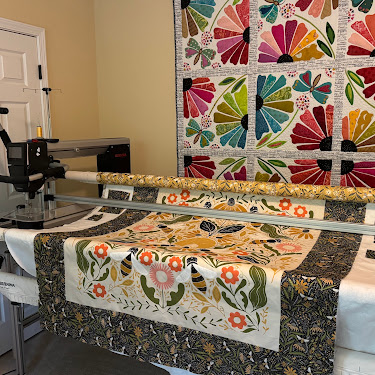
The Bzzzzzz Quilt is a pattern from Whole Circle Studio. I made the mini version of it for my daughter-in-law's birthday. My daughter-in-law, Allie, loves bees and a bee is also the mascot of the school that she works at as an SLP.
I finally finished the quilt and now we're trying to get yet another cancellation for the Starcruiser. Wish us luck!
Monday, April 3, 2023
The Florida Quilt π΄
The Florida Quilt π΄ is a quilt that I made for my niece and godbaby, Tiffany. She's getting married in May. She grew up in Florida, so, I made this quilt using hand dyed batiks in all the colors of the beach and skies of tropical Florida.
The pattern is one that I've used before. It's a log cabin with a twist. As you sew rectangles around the square in the middle you trim them off at an angle giving the finished square a wonky touch. Some call this a hippie quilt. Only instead of jean material, velvet, satin, beads and ribbons I used hand dyed batik material.
In the past I used my own templates to cut each round off at an angle. But Creative Grids now has a 10" Wonky Log Cabin Trim Tool. This works the same as my hand drawn templates and finishes with a perfect 10" square. It's a very easy tool to use.
I chose not to do much quilting on this quilt because I wanted it to be more cuddly than the normal quilt. The more stitches used to quilt a quilt the stiffer the quilt becomes. At least, until it's washed a zillion times. So, I chose to just stitch in the ditch around the pattern to showcase those wonky angles.
Sunday, September 11, 2022
BLUEBERRY FEATHERS QUILT
I followed Kristy online on Instagram as she designed this paper pieced feather step by step. Quite some time later she came out with the pattern which I purchased and then made a quilt for myself. It hangs on my wall in my sewing room.
Once I made it for myself I decided I would make it again for my nephew and his wife. My nephew is a musician who has traveled the world with his band. He is married to an award winning chocolatier who opened up her own bakery. He also works in the field of library sciences bringing all sorts of media to life. Because he and his wife are both so talented and creative I didn't want to make them a traditional quilt. I wanted something with more of an artisan vibe to it. That's why I chose this quilt. This quilt is made using the art of paper piecing. It's an art you have to master but once you do it becomes easy to sew all the little pieces together. I also chose fabrics that aren't your normal everyday fabrics. I purchased fabrics designed by textile artisan, Karen Lewis, from Leeds, England. She designs and dyes her own fabrics and screen prints them by hand. Her fabrics are very modern and beautiful.
There are 28 paper pieced feathers in this quilt. Each feather is made up of 28 small pieces of fabric which are sewn together in a very unique way onto the back of a paper pattern.
When you are done the paper is ripped away and you're left with a beautiful little feather. Here are some photos of each step that goes into making just one feather ...
Once on the longarm I did one inch straight stitching for the quilting using Glide thread in white in the top and bottom threads. With paper piecing there is a lot of bulk in the seams so straight stitching works well.
I used Quilter's Dream White Polyester Batting because of the white background fabric. Using a regular batting would make the quilt appear dingy. I didn't want to waste any leftover fabric so I used the scraps in the backing of the quilt.
And here is my "Master Quilt Holder" holding up my quilt to photograph.
Remember to pick up a needle and thread and stitch some love into your world❣️
Saturday, December 4, 2021
THE MERMAID QUILT π§♀️
This is the second Mermaid Quilt that I have made. I quilted this one as a baby gift for my friend, Ashley. Her baby girl is due in December.
Although, this quilt has the look of an appliquΓ© quilt it is actually a quilt panel from Hawthorne Supply Company. Hawthorne Supply prints digital fabric and can print this panel any time you want one. The backing is also a digital print of tiny mermaids.
Because I knew that I would have to roll this quilt back and forth on my longarm to get the background elements stitched in I basted the quilt first on the longarm. Once I got to the bottom I released the quilt top from the bottom rail and floated it for the rest of the time.
I did all of the stitch in the ditch quilting first. I used Aurifil Monofilament thread on the top so that it would not show and MicroQuilter white thread on the bottom. These have a similar thread weight to them. Once I finished that I went back and filled the elements of the quilt in. I started with the Mermaid's hair. This is my favorite part of the quilt. I pulled the basting out as I went so it would not get stitched down in the back. I left the basting in to the sides where I hadn't quilted and pulled that out as I got there.
For the hair and the rest of the quilt I used Glide thread on top. White for the background, Buttercup and Honey Gold for the hair and Amethyst, Magic Mint, Pink Rose, Celery, Cobalt and Slate for the rest of the elements.
Once I finished quilting the elements I worked on the white background. I wanted it to look like the mermaid was pushing waves of water with her hands. I also wanted waves of water around her tail as she splashed in. I only quilt with 24 inches of the quilt top showing at one time, the rest is rolled up. To make sure that I got a seamless "flow" of the little waves I traced them onto the top first and then just sewed over my markings.
Next, I scattered little flowers all over to mimic the flowers in the quilt top. Then I made sea weed to meander between the flower stalks and petals. I did use a small circle template for part of that. Then I put in the baby's name and then pebbled around everything.
The tension on the back of the quilt where it was pebbled had some eyelashing. Next time I think I will use Glide thread top and bobbin and perhaps tighten the stitch length a bit more. I used 11 but maybe 12 would work better.
I got this quilt finished just in time for Ashley's shower. I hope she enjoys it!
Make sure to pick up a needle and thread and stitch some love into your world❣️